Davor Josipovic Just another WordPress blog – rather tryout

28/07/2012

Transcode mkv – batch file for windows

Filed under: batch,Programming — Tags: , , , , , — Davor @ 10:47

What it does: transcode your mkv to x264 with a specified file size. You drag & drop your mkv-file on the batch file, chose some options like target size, and it starts the transcoding process. It re-encodes the video and leaves all other streams intact (unless you exclude them). It uses handbreakcli and mkvtoolnix.

The batch file can be found on GitHub. I based it mainly on this fine article (for linux).

It’s still a work in progress, but currently, it does the job.

What you need is:

Make sure you set the correct paths in the transcode_settings.ini file. The rest should work.

Here is how it works. After you drag a file on transcode.bat, a command line window opens:

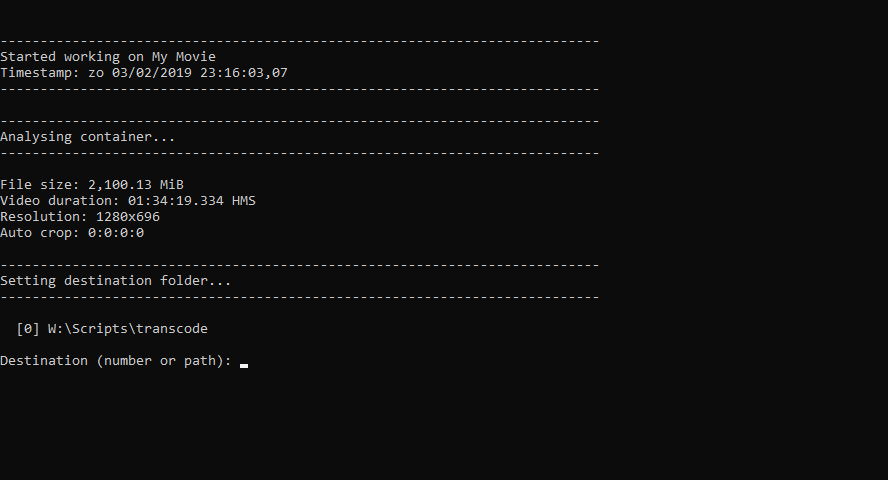
There is only one destination path set, so I press “0”. I can also fill in a new destination path. This new destination path will then be saved in transcode_settings.ini and will be available next time under option [1]. Now I have the option to remove some audio and subtitle tracks.

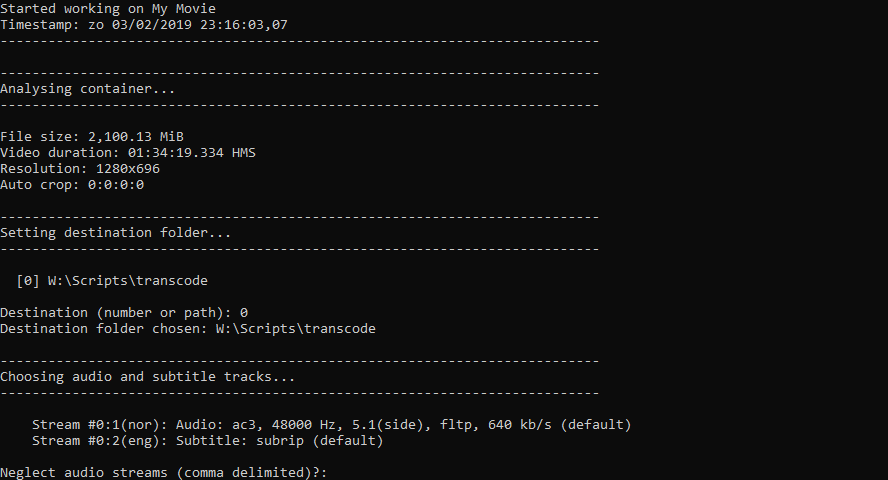
Since I don’t want to remove any audio tracks I press “Enter”. Then I press “1” to remove the English subtitle stream.

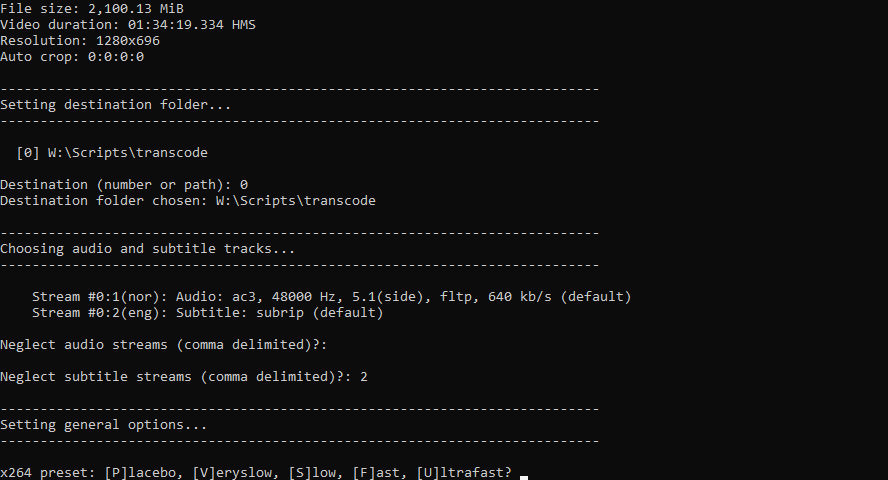
Now I have to set some general transcoding options. I want a very good quality to bitrate ratio, so I select the very slow option by pressing “V”. I further select “A” for auto cropping (which is in this case equivalent to no cropping), and I also type “N” to signify that the movie is not black & white. Since I want a fixed size encode, I type “Y”, “N”, “N” to get an impression of what the optimal size would be.

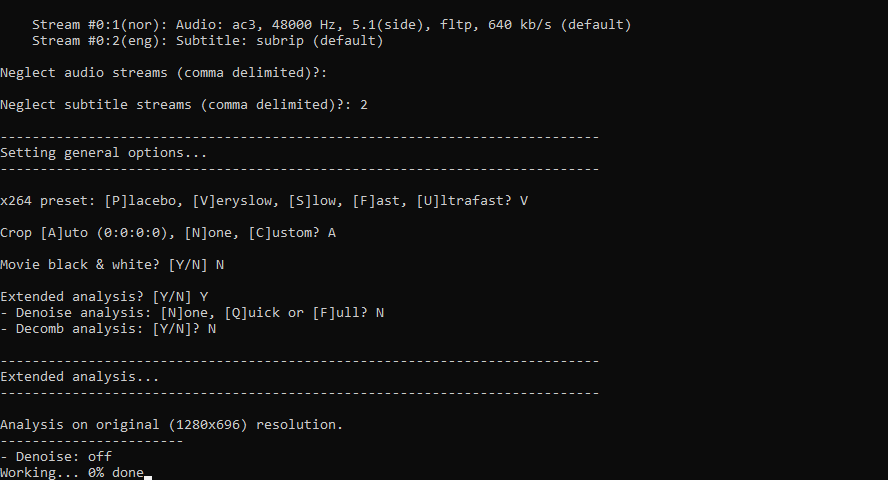
The batch will now transcode a few samples based on the selected settings, and suggest a few optimal transcoding techniques:

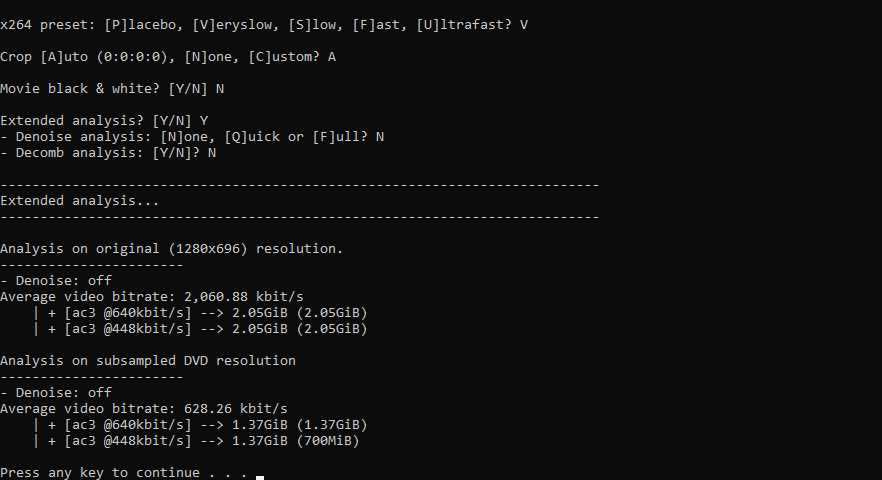
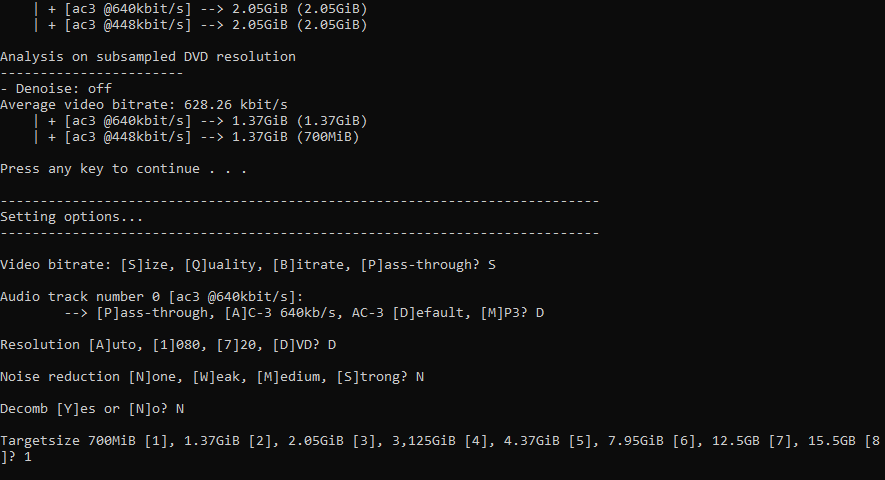
For DVD resolution, if I transcode the audio stream to ac3 @448kbit/s, then the 700MiB size is 10% within the optimal range of predefined RF 20. Now I can select the handbrake transcode setting. I type “S” for a fixed size 2-pass transcode, “D” for AC3 448kbit/s audio transcode, “D” for DVD resolution, and twice “N” since I don’t want any noise reduction or decomb filter. Since I selected “S” for Size in the first option, I am now aked what my target size is. I type “1” for 700MiB and the transcoding process starts.

Since this is an ordinary batch file, all the options are easily adjustable to one’s own needs.

10/07/2011

Select screen for XBMC without 3th party tools

Filed under: batch — Tags: , — Davor @ 20:43

This is usually done by changing the default display with some tool (DisplaySwitch.exe, UltraMon,…) Here we simply use XBMC’s advanced settings and a simple batch file which will allow to select the startup options (in this case the screen), copy the corresponding advancedsettings.xml to the \userdata\ folder and start XBMC on the correct screen with custom properties.
For this we use XBMC in portable mode (with command line option –p), but it could also work without. Make this folder structure in your XBMC directory:

portable_data\config\adv_settings

In adv_settings folder we put 2 files from which we will chose during startup:
Advancedsettings_monitor.xml:

<advancedsettings>
	<videoscreen>
        		<screenmode>WINDOW</screenmode>
	</videoscreen>
    	<window>
        		<height>720</height>
	        	<width>1280</width>
    	</window>
	<input>
        		<enablemouse>false</enablemouse>
	</input>
</advancedsettings>

Advancedsettings_tv.xml:

<advancedsettings>
	<videoscreen>
		<screenmode>10128000720050.00000</screenmode>
	</videoscreen>
</advancedsettings>

These values are taken from guisettings.xml in the \userdata\ folder. So it’s best you set up XBMC and take the settings you need from guisettings.xml and put them into advancedsettings.xml. Apparently, in my case 10128000720050.00000 corresponds to full screen on the TV.
Finally this simple batch file will let you choose between the two:

@set batch_path=%~dp0

:: Choose Monitor-------------------------------------
@choice /C 12 /M "Start on TV[1], Monitor[2]?" /N /T 3 /D 1
@goto ANSWER%ERRORLEVEL%
::----------------------------------------------------
 
:ANSWER0
:ANSWER255
@GOTO ERROR
 
:ANSWER1
@copy "%batch_path%adv_settings\advancedsettings_tv.xml" "%batch_path%..\userdata\advancedsettings.xml" /Y
@IF ERRORLEVEL 1 GOTO ERROR
@GOTO exit
 
:ANSWER2
@copy "%batch_path%adv_settings\advancedsettings_monitor.xml" "%batch_path%..\userdata\advancedsettings.xml" /Y
@IF ERRORLEVEL 1 GOTO ERROR
@GOTO exit
 
:ERROR
@echo "Wrong batch execution... check batch"
@pause
@GOTO QUIT
 
:EXIT
@start /D "%batch_path%..\..\" XBMC.exe -p
 
:QUIT

Now all you need to do is run the batch file, type 1 or 2 and XBMC will start on the correct screen. It is also obvious that these advanced settings allow much more customization than is shown here.

An other interesting way would be to use the API called SetwindowsPos… and even more interesting would be to expose the XMBC API to the command line prompt as suggested here.

Powered by WordPress